Showing posts with label budget friendly. Show all posts

Wednesday, June 17, 2015

State of the Vegetable Garden: June, 2015

I am remiss. I promised quite some time ago to share pictures of the garden and I have drug my feet and procrastinated with the best. I swear, I'm not a procrastinator in real life!

The vegetable garden is in full swing! I took this as an opportunity to experiment with my panoramic setting on my phone camera (someone explain to me why I have not used this feature before?), so you can see the full vegetable garden in all it's glory (even if some of it is currently in shadow from the maple tree).


You can sorta, kinda, see the raised beds further out in the yard. Please excuse the weed-ridden sunken patio. The hubs and I have plans for that area, but we need time (and funds for materials) before we can do anything about it.

So, details...if we move in closer (much closer), you can see that the blueberry bush is fruiting! I've gotten a few wonderfully ripe berries off of it so far, but I think the birds are mostly beating me to the punch. Guess I need to hang some shiny things to scare them off.


I dug up a large crop of my Egyptian Walking Onions a week or so ago which I am, in short sessions, chopping and freezing. These onions are not kidding around. They are VERY strong and they make my eyes burn and tear like you wouldn't believe. Last year's crop mostly filled a one-gallon freezer bag, and lasted us all year. I took a few of the above-ground bulbs this plant uses to spread and planted them in pots. I will find a new spot for them later, but in the meantime, they have lovely white flowers!


The hubs and I picked this wonderfully fragrant cinnamon basil up at our neighborhood farmer's market. It has lovely purple-ish stems and purple flowers. It's going gang busters, and I need to pinch it back so it doesn't go to seed!


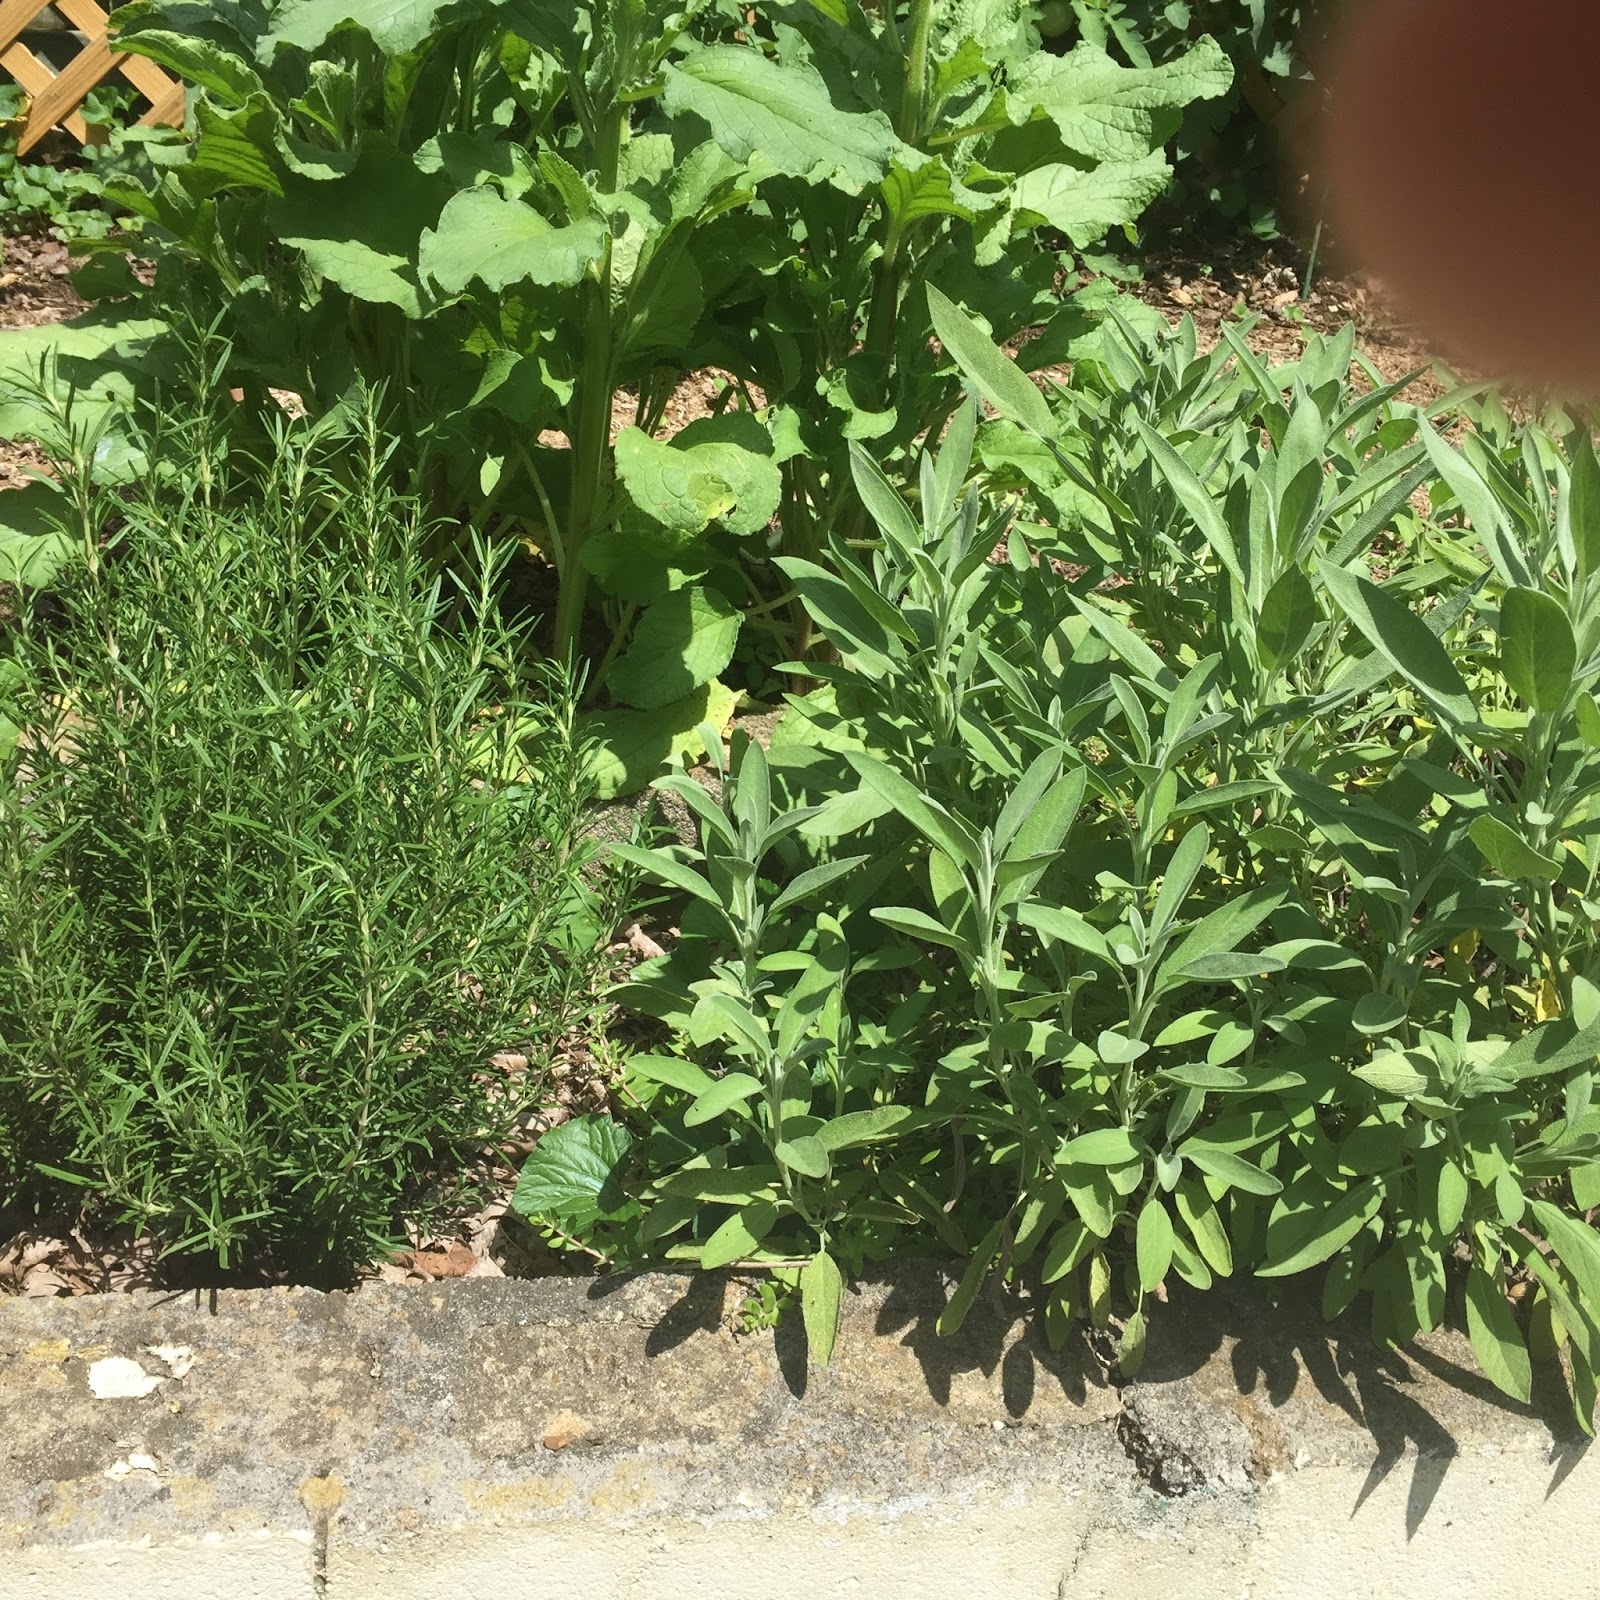
The rosemary and sage seem to like their spots. There are multiple plants of each of these, and I recently had to (viciously) cut back the sage as it was making a bid for world domination, but I waited for it to finish its show of purple flowers first!

The asiatic lilies were here when we moved in, but they are now tucked between the sage and lavender, which is also in bloom. You can also see the borage blooming behind it in the in-ground garden.


These tiny portacula (also known as moss roses) are on their third or fourth round of blooms. These are some of my favorites this year, but I kind of wish I had planted them closer together! Live and learn...


The dill I purposefully planted two years ago continues to re-seed itself. It smells heavenly!


Please excuse my finger that made its way into the following picture. Since so many of my seedlings got fried this year, the hubs and I bought several pepper plants from the farmers market. There are five varieties this year, so we should be set for peppers for quite a while! I planted most of them in pots to save room in the raised beds.


The in-ground garden is having a great first year! Maybe it's the virgin soil, or the compost nd organic fertilizer I dug in, but nearly everything I planted here is huge and growing fast! Case and point, I had intended the middle path to be easily walkable, but I definitely have to turn sideways to avoid breaking off errant tomato branches.


The swiss chard is looking lovely, and one of my projects for the day is to make chard chips from these lovelies!


A better picture of the borage. I have never planted this before, but bees love it, and the tiny flowers taste like cucumbers! I also hear that you can eat the leaves if you get them when they are small, but they get spiny and tough when they get large.


I have had to steak, tie, trellis, etc. all of the tomato plants. They are HUGE and have tons of green tomatoes on them right now. You can see them peeking through the leaves, and I've got one or two that are almost ripe!


Another experiment this year is pumpkins. I planted Jack-be-little pumpkins. They are small sugar pumpkins that are ideal for small-space gardening, and can even be grown in a large container and trellised! I planted one to grow on the ground like traditional pumpkins, and a few more to be trellised. I wanted to see if one way worked better than the other, so I'll keep you posted on what I find!


Moving on to the raised beds, the squash is blooming! I only planted two of these so we wouldn't get overwhelmed by squash as the summer goes along. As much as I love yellow squash, I don't need five tons of it!


I ran out of appropriately sized pots before I ran out of peppers, so some of them ended up in raised beds after I dug out the onions. Supposedly, this is a less than ideal rotation, but I had to have a place to put them, so hopefully they'll turn out okay. One of them is currently sporting a banana pepper, so I'll take that as a good sign!


The second bed is planted with nothing but beans. I plant bush habit green beans every year because they always give a good harvest, and freeze well, but I also planted some speckled lima beans my mom gave me seeds for. The seeds are gorgeous...red with black speckles. I can't wait to see what they taste like!


The third bed is planted with purple beans and another trial this year: okra. I love making vegetable gumbo (it was one of my grandmother's best loved recipes), so I'm hoping for a good crop to go with my tomatoes so I can make a big pot or two!


The last bed is planted with turnips, which you can see peeking up above the soil, more peppers, and what is looking to be failed malabar spinach. You can see in the close-up picture how tiny those seedlings are, and I planted them in March!! What a disappointment. I probably should cut my losses and find something else to plant there, but I kind of want to see what happens with them. Supposedly, this variety will grow through the summer, but I will need to give it some kind of trellis to grow on.


So there you have it. One very long post, but a good idea of what is going on in the veggie garden. I have a couple of to-do's which should get done in the next week or two, but other than pulling weeds and keeping things watered, the garden is mostly self-sufficient, which is great. How is your garden doing?

Tuesday, December 30, 2014

One goal down: building a trellis

Ok, one garden goal down! I jotted down my list of goals in my last post, and I'm happy to say that I have completed one of them. As I was sketching out a schedule (which is still on the way), I decided I would be more likely to achieve the larger construction goals if I completed at least a few of them while I am on break from school. Because when the spring semester starts, things are gonna get CRAZY.

Building a trellis on the fence where my in-ground garden is going to be seemed like a good and simple goal to start with. Here's a picture of the area. It's the spot between the retaining wall and the fence where the leaves are spread out to smother the grass and weeds.


 I've been thinking about doing this for a while (since last year, actually), so I've had time to debate what kind of materials I wanted to use. I was thinking of using wire fencing and stapling it to the fence posts, but the hubs objected saying that it would probably look "hideous" (his word), and he would rather I use sheets of trellis. The price worked out to be about the same between the two methods, so we came home from the hardware store with five sheets of lattice.

I had the forethought to actually measure before we went to the store, so I knew my fence posts are 8' apart, and about 6' tall. Sheets of trellis turned out to be 8' long and 4' wide. Thus, I got five sheets of lattice and had two of them cut in half lengthwise at the store.

I had a couple of false starts. I originally thought to use some scrap wood blocks to hold the lattice away from the fence. I got my blocks cut and screwed onto the fence like so...


But since the fence posts already stick out from the fence, it caused the lattice to really bow and seem unstable. It also made it a lot harder to actually screw the lattice down because the two didn't always match up if I had the lattice level. With that failed attempt, I removed the wood blocks and simply screwed the lattice directly to the fence posts.

I didn't get the cut in half pieces up. The hubs was out and it would have taken two people to get the pieces of lattice up and screwed on. Also, I'm not sure how it will look since my fence is on a slope. Additionally, see how the lattice sticks out from the actual garden spot? It doesn't line up with the fence post (sad face), so maybe I will put a large pot there and plant something in it that vines. We shall see. I'll have to do some experimenting!

I've seen some really creative trellis designs, some meant to be decorative, and some purely functional. How did you go about making your trellis?

Sunday, December 29, 2013

Newest addition: a dishwasher!

Merry belated Christmas! I hope you all have been doing well the last couple months. Things have been INSANELY busy here between school and work, so I made the executive decision to put home improvement projects and the blog on hold until I got to Christmas break. Anywho, to the topic at hand...

We knew when we bought our house that we would be washing dishes by hand for a while. Not only was there no dishwasher, there wasn't even a place to install one! This is our kitchen when we moved in.


No dishwasher...that blank space to the left of the sink is where a refrigerator originally resided.

This routine of washing dishes by hand was fine for a while. I never had a dishwasher in my college days in Boston, but as often as we cook and entertain, handwashing every dish has been pretty cumbersome. It is by far the chore that we spend the most time on. My poor, wonderful mother-in-law washed every dish from Thanksgiving dinner for five people and it took forever, even with another person drying and putting away as we went.

Since I've gone back to school, my husband (who is also wonderful) has been doing most of the dishes because he has been home so much more than me, but he is starting school in January as well! So with BOTH of us in school and working, we decided what we really wanted for Christmas was a dishwasher. The consensus was that it would make our lives WAY easier, and would free up a lot of study (and fun) time for both of us. Well, thanks to a very generous gift from my parents, we finally have a dishwasher!

We decided to go with a Bosch for its low volume and efficiency. However, before it could be installed, I had to build a place to install it!

Since we aren't ready to tackle a remodel yet, we decided that a temporary box made of plywood would be fine. Just something to keep the dishwasher from walking across the room. Since the sales guy from the appliance store gave me a diagram with the dimensions of the dishwasher and surrounding box, This was pretty easy. I picked up a couple pieces of plywood and a 1x2 from Home Depot, and had the nice man in the lumber department cut the plywood to size. I think everything cost about $40. I painted the plywood so that it was waterproof. Next, I cut the 1x2's into the correct lengths to be used for supports. Lastly, I installed the plywood by screwing it into the 1x2's, using a level to make sure nothing turned out crooked. This is what I ended up with.


Oh, and I also later added a shim under the front of the vertical piece to hold it steady, since there wasn't a good way to attach it to the tile. I did try drilling through the tile to add a bracket to the floor, but the tile bits kept losing their pointed heads. Has anyone else had that happen?

Anyway, when the guys came to deliver and install the dishwasher, they had to drill a hole at the back corner of the cabinet to run a water line. They also had to work some plumbing magic and install a split valve under the sink and drill a hole through the horizontal plywood to run the electrical cord (I discovered too late that there is no electrical box under the sink). Here is the final result...


We are eventually planning to rip out (at least) everything from the countertops down and start over, so this is definitely a cheap temporary solution, but we have a dishwasher! Life is better already.

Monday, May 20, 2013

Painting a Concrete Floor

Ok, the floor in the music room is painted and I've been slowly chipping away at the final touches to call this room done, but in the meantime, it's habitable! Hooray!!

So about those floors.....here they are.


Well, the paint was still wet in this picture....it's not shiny at all now that it's dry!

So I already went over the crazy/scary part of painting concrete floors. The rest was easy (excepting maybe waiting 5 days to put anything on said floors while the paint cured).

The first thing I did was use a bonding primer so that the paint would really stick to the concrete. That had to dry for at least 24 hours before the first coat of paint went on. Here's a mid coat picture...

I used Behr's porch and floor paint for this because it was what they recommended at Home Depot. It's really thick and sludgy! And with the color I chose, it looked like (and was about the consistency of) chocolate cake batter coming out of the paint can.

I actually did two coats, because just one left a few spots that weren't completely covered, but since the second coat was so much thinner than the first, I got away with only using one gallon of paint.

Ready for the before and after? Here's the garage as it was when we moved in....

...and here it is (even with a little bit of furniture!)

While things look pretty decent in this pic (which I hurriedly took with my iphone, so it's not the greatest), there's still quite a bit to be done in here. I've still got to bring in a desk, more chairs, make another set of curtains (there's a window on the far wall), finishing touches on the paint....in short, I've still got plenty of work to do!

Monday, April 29, 2013

Well obviously my New Year's intention is a bust....but we'll try and hop back in the saddle.

My mother, who is an avid and gifted seamstress (she used to make my formals when I was in high school!) got a new sewing machine for Christmas this past year. Since her old (and very nice)sewing machine still works just fine, she decided to hand it down to me. Well, it sat in my guest-room-to-be for a few months, unused. I have to admit, sewing has always been pretty intimidating for me. This weekend, however, I finally worked up the nerve to try my hand at some (very) simple curtains.....as in, all I had to do was hem all four sides of the fabric haha.

I had seen this neato fabric online....


But didn't really fall in love with it until I decided to paint the guest-room-to-be (currently serving as my music room until we get the garage converted to living space) a dark, muted teal color (Martha Stewart's Plumage, for those of you who are wondering).


See how the color just begs for some more white, and maybe some dove grey, plus maybe some pattern? Don't worry....the rug is not staying in there.....

Anyways, I picked up eleven yards of the stuff for just under $8/yard at The Fabric House a couple months ago (yes...I really have been putting this off that long). This past weekend, I took a deep breath and dove in.


Bam....it's not a great picture. I'll be able to get better ones, I think, once I can move things to the new music room....or at least figure out how to shoot looking at a window without the photo getting washed out....maybe I'll try to get some pics when it's dark outside.

Breaking down the budget, the fabric cost me about $88, plus another $5 or so for thread. That works out to about $45 per window. In most stores, you would spend at least that much per panel, so I think I did pretty well!

Anyone else been making curtains lately?

Tuesday, April 2, 2013

Dressing out the Man Cave

I've been charged with a very special mission: making the man cave a functional and comfortable place to be. That in itself isn't that hard, but doing it to my husband's tastes has thus far been more challenging!

One of the things my husband really loved about this house when we bought it is the finished basement that runs under half the house. The idea was that if I get my own personal space (my music room), that he should get one too. That way he has a place to retreat, work out in and watch all the football he wants. He can decorate it anyway he wants and I don't get a say, so he can deck it out in all the Georgia Bulldogs gear he wants, and I don't have to look at it! Haha

So here's what it looked like when we moved in. Very cave-like, no?


Before he took of for the other side of the world, he put down some gym flooring for his workouts (he's big into weight lifting). I also found an arm chair and ottoman at a local thrift store (it was less than $10, and if he had hated it, I could have Craigslisted it). It's comfy and gave him a place to watch the fancypants TV he bought to go down there.

He mentioned he wanted our old couch down there once we got the new one (this happened back in November, and I bribed a couple of college kids from my church with a home cooked meal to come and move it for me).

He also asked me to find a rug so he could walk around barefoot without freezing his feet on the linoleum floor. I approached this with some caution, since I was going to have to guess what he would like. The way I got around this? I started by finding a couple rugs online (this one and this one) I thought he would like and sending him the links for his approval (or non-approval).

I was ready to order one of them, when I was walking through Home Depot and saw this...


Very similar to the others that Jacob had already approved, but less than half the price. Plus, I figured the indoor/outdoor design would be easier to clean/more durable for the situation. I snapped a quick picture with my phone and sent it off to Jacob for approval. Score one for the wifey. He loved it! So I went back a couple days later and purchased the 5'x7' version to fit the TV area. Here's a picture of it in place.


It's a little messy down there at the moment.....I've definitely taken advantage of the fact that he's not here to gripe about it to store artwork etc. while I paint other rooms (yes...I've been at it again) and decide where I want it all to end up.

Next up, figuring out how to get a little more light down there!

Saturday, March 23, 2013

Building a Storage Shed

....Or rather, paying someone else to build one for me. Professional carpenter I am not.

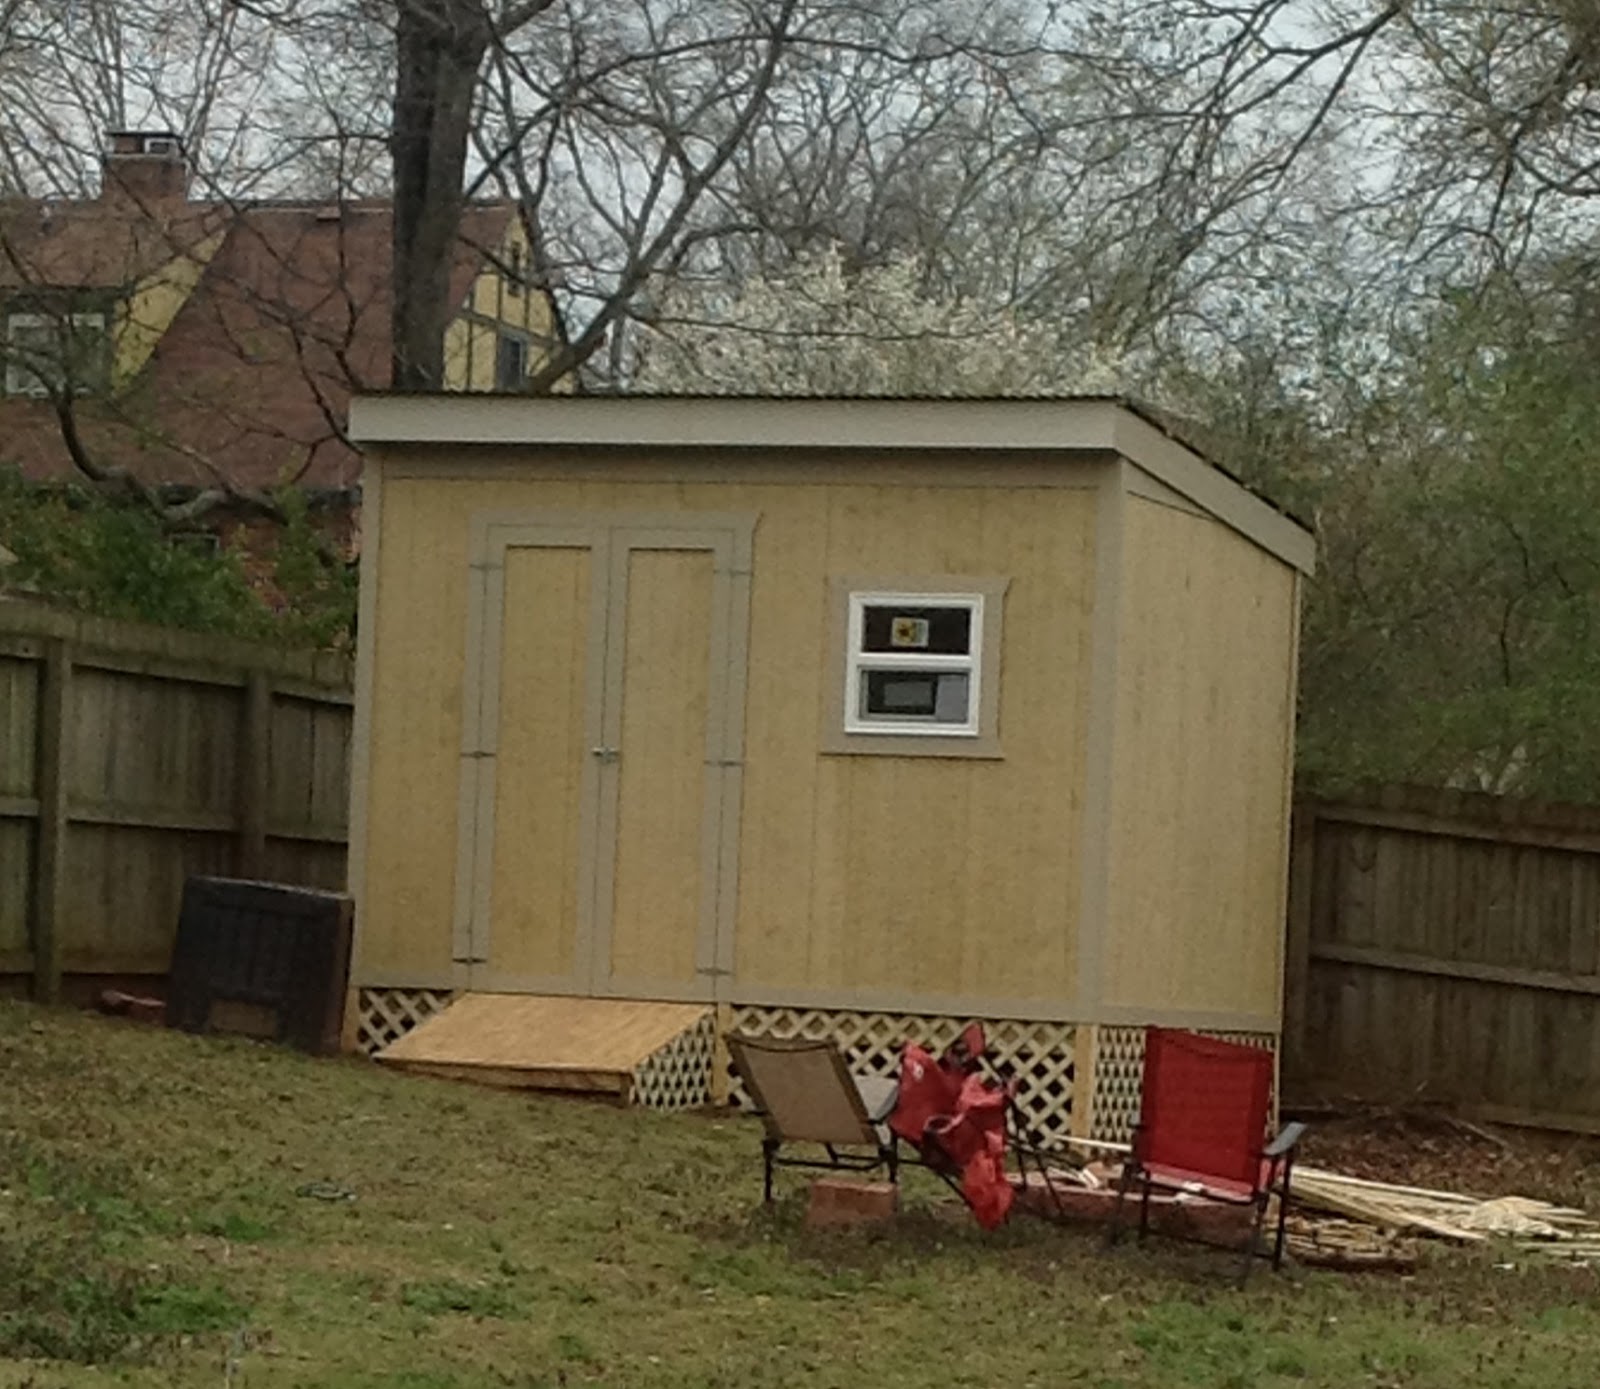
This project started back before the end of 2012. Jacob and I knew when we bought this house that we wanted to put a storage shed in the backyard so we could convert the garage into a music room for me. Well, it's done, and ain't it purty??
 

Obviously I still need to paint it, and I'm actually thinking I'll stain it, and just paint the trim, and I need to add shelving and hanging storage inside, but I elected to do those parts myself to save a little bit of money.

But lets get back to the beginning. I tried to do my research on this and in reading up on what makes a good quality shed. I found very quickly that I could get a larger, better quality shed for a much better price if I just had one built rather than buying one from the hardware store.

So I found a contractor that I liked and who gave me a price that I liked (a 10'x12' shed for under $2k) and let him have at it.

I worried that I would need to get a construction permit, but my contractor fortunately knew that Metro Nashville doesn't require a building permit for a shed that can be put on a skid and moved. With that knowledge, he was able to design and build a shed without the added cost of a permit. Gotta love a contractor who's on your side right?

He started with the floor built onto the cinder block foundation.


And then framed out the walls.


Next came the actual walls.


And the roof was framed. You can actually see the metal roofing material off to the side.


Next came the roof, fascia, cutting in the doors and trimming them out.


Then the window for some light (with associated trim)...


And finally the skirting around the bottom accompanied by some serious happy dancing!


Have you ever built, bought or otherwise added a shed to your yard? What was your experience like? Right now, I'm just excited that the garage can be cleared out for some music room making!

Saturday, March 2, 2013

Built-in Bookshelves IKEA Hack

First of all, let me just say this post is extremely belated. This project started in November!! Though sadly, I literally JUST finished...am I just a procrastinator? Maybe we can all agree to be kind and just say that I was taking my time so it would be just right....

So I've had this crazy idea to add built-in bookshelves to the living room for a while now, so when my dad came up from SC to visit me a while back, I asked him if he would help me build these shelves. Thank goodness for handy dads!


The bulk of the work took about a day, and it was mostly not difficult. However, what Dad and I didn't finish together was left to me to finish, and even though I've chipped away at it here and there, it's taken me longer than it probably should have to completely finish.

First, I measured the width of the room to be sure how many sets of shelves I would need. The living room is about 11' wide, and four sets of Billy bookshelves left about a foot of extra room. I wasn't really sure how to deal with this, but my dad suggested we make those narrow shelves in the middle to span the distance (he's so smart!).

Since we don't have an IKEA here in Nashville, Dad was nice enough to bring them from Charlotte (my parents live in that area, but on the South Carolina side of the border). We assembled the shelves and clamped two at a time together to be sure everything was flush. Since my house is on the older side, my floors aren't completely flat, so we slid wood shims (those little wood wedges you find at the hardware store for keeping furniture, dishwashers, etc from wobbling) under the fronts to get the shelves flush with the wall, and then bolted them to the wall, making sure to go through a stud. Wouldn't want them tipping over on anyone!

Next, we picked up some 1x2's, 1x4's and some molding at the hardware store to build a face frame for the shelves. This is what actually makes the shelves look built in and not like they came out of a box. The molding at the top went up first, followed by the side pieces and the two middle pieces where the IKEA shelves actually meet (the vertical pieces surrounding the narrow shelves came later).

Oh, and I learned that since my home is old-ish, my walls aren't necessarily square. To circumvent this problem and get those 1x4's flush with the wall, Dad showed me how to scribe. I'm not very good at it (yet), but the basic idea is that you use a compass (like you used in geometry class) to trace the shape of the wall onto your 1x4 and then cut off the excess material so your board will fit to the wall. It was really hard to do, and Dad had to re-do the side I did because I messed up the bottom where it had to fit to the existing molding. Oh, and yes, I did get paint on the existing baseboards, but I am going to paint them soon-ish anyway!


I did the narrow shelves by myself. Those are just pieces of melamine cut to the width of the narrow space and held in place with pieces of 1x2 rails nailed underneath.


Next, I drilled the two wiring holes through the shelves (you can see it peeking out from behind the owl vase) and painted the backs of the shelves. The color is Starless Night by Behr and I love how the super dark navy blue lets the items on the shelves really pop.


Next up was the last two pieces of the face frame, then caulking to fill nail holes and gaps, then painting the frame itself.

Not too shabby eh? Oh, and the whole project was under $300.....real built-ins, while more authentic, would have run me several hundred dollars more....yikes!

Anyone else been doing construction in their living room? Or anywhere else in their house?