Wednesday, February 21, 2018

The Year Ahead

I've got some big plans for this year and I thought I'd share them. My garden last year was basically nonexistent (for multiple reasons), but I think (I hope) I've got things figured out this year. Last spring, I lost most of my seedlings when my tiny greenhouse was blown over in a storm...a tragedy that was multiplied by missing the harvest on most of the plants I did actually get in the ground. I did a lot of traveling last spring and summer...not conducive to having a garden! In fact, you can see the aftermath of one of my trips here:

Yikes...

One big success from last year was that I discovered a service called Chipdrop. They connect you with arborists working in your area. I had a mountain the size of two VW buses (!!!) of freshly chipped cherry chips dropped on my driveway in August. Those wood chips mulched every bed on our property several inches deep with a ton leftover. My sweet husband decided took the initiative to use the chips that were left to build me a new (gigantic) bed at the back of the yard. I'm slowly filling it with perennials of both the edible and ornamental variety.

Understanding my goal-oriented nature, I sat down a couple weeks ago and wrote out a few for this year. I've even already accomplished a few of them! Here they are:

  • Enlarge existing raised beds to 4'x8' (I've already done this, but they were 4'x4'...pictures will be forthcoming!)
  • Build an arch trellis between the two most northern beds for beans, butternut squash, etc.
  • Plant blueberries. I tried this last year and both bushes died from drought during one of my trips. New bushes have been ordered, so I'm halfway there on this one.
  • Plant a dwarf fruit tree that is self-pollinating in the new bed at the back of the yard. I've chosen to plant (and have already ordered) a pie cherry called a Northstar Dwarf. I'm hoping it will arrive this week!
  • Plant an asparagus bed. This has already been done.
  • Transplant Japanese Maple to new bed at the back of the yard. This is done!
  • Move the rhubarb to a place where it is less likely to be stepped on.
  • Keep good notes on the garden. I've started this, so I just have to keep it up!
And here's the biggie: May-December (and earlier/later if I can manage it), I want to purchase no produce from the grocery store. 
Now, between the garden and our CSA share, this should mostly be no problem. But the only fruit our CSA farm does is strawberries, and my fruit trees and bushes are a few years away from fruiting. I'll have rhubarb from my own garden, and have plans to purchase extra strawberries from the CSA farm for canning and freezing, but that leaves out a lot. My plan is to purchase fruit in bulk from farmers while it's in season. I'll do the same thing with corn since our CSA farm doesn't grown corn, and I would rather keep the garden space for other things.

This last goal in particular is going to take some work on my part. I'm going to be busy canning, pickling, freezing, and drying in order to have enough to last, hopefully, through the winter. However, I know the difference in nutrition and flavor will be my payoff. I might even have a reduced grocery bill!

Tuesday, July 7, 2015

Today's Harvest

My tomato plants are going crazy! I've picked at least a couple tomatoes every couple of days for the past couple weeks. I'm still waiting on the peppers to catch up, but here is a picture of part of today's bounty.


I've had a rash of tomatoes with worm holes in them, and so decided to pick a few that are close to being ripe before the bugs got to them. They are wrapped up in a paper bag to finish ripening.

Anyone know how to keep the bugs from eating the tomatoes?

Monday, June 22, 2015

A small bit of harvesting

Well, I got a handful of turnips from the garden today. Nothing really to write home about, but it is enough to make a batch of chicken soup, so I won't write it off as a total loss, but this goes back to my lack of balance in trying to get the garden started this year while still in school. I neglected to water the seeds regularly after I planted them, so many did not germinate.


On the other hand, I'm excited to report that I've gotten my first tomatoes from the garden! A couple ripe reds and a couple of green tomatoes that I had to pull early because they were dragging the vine down and touching the ground, which I understand can lead to disease. Here's a picture of my tomato bounty (so far).


Wednesday, June 17, 2015

State of the Vegetable Garden: June, 2015

I am remiss. I promised quite some time ago to share pictures of the garden and I have drug my feet and procrastinated with the best. I swear, I'm not a procrastinator in real life!

The vegetable garden is in full swing! I took this as an opportunity to experiment with my panoramic setting on my phone camera (someone explain to me why I have not used this feature before?), so you can see the full vegetable garden in all it's glory (even if some of it is currently in shadow from the maple tree).


You can sorta, kinda, see the raised beds further out in the yard. Please excuse the weed-ridden sunken patio. The hubs and I have plans for that area, but we need time (and funds for materials) before we can do anything about it.

So, details...if we move in closer (much closer), you can see that the blueberry bush is fruiting! I've gotten a few wonderfully ripe berries off of it so far, but I think the birds are mostly beating me to the punch. Guess I need to hang some shiny things to scare them off.


I dug up a large crop of my Egyptian Walking Onions a week or so ago which I am, in short sessions, chopping and freezing. These onions are not kidding around. They are VERY strong and they make my eyes burn and tear like you wouldn't believe. Last year's crop mostly filled a one-gallon freezer bag, and lasted us all year. I took a few of the above-ground bulbs this plant uses to spread and planted them in pots. I will find a new spot for them later, but in the meantime, they have lovely white flowers!


The hubs and I picked this wonderfully fragrant cinnamon basil up at our neighborhood farmer's market. It has lovely purple-ish stems and purple flowers. It's going gang busters, and I need to pinch it back so it doesn't go to seed!


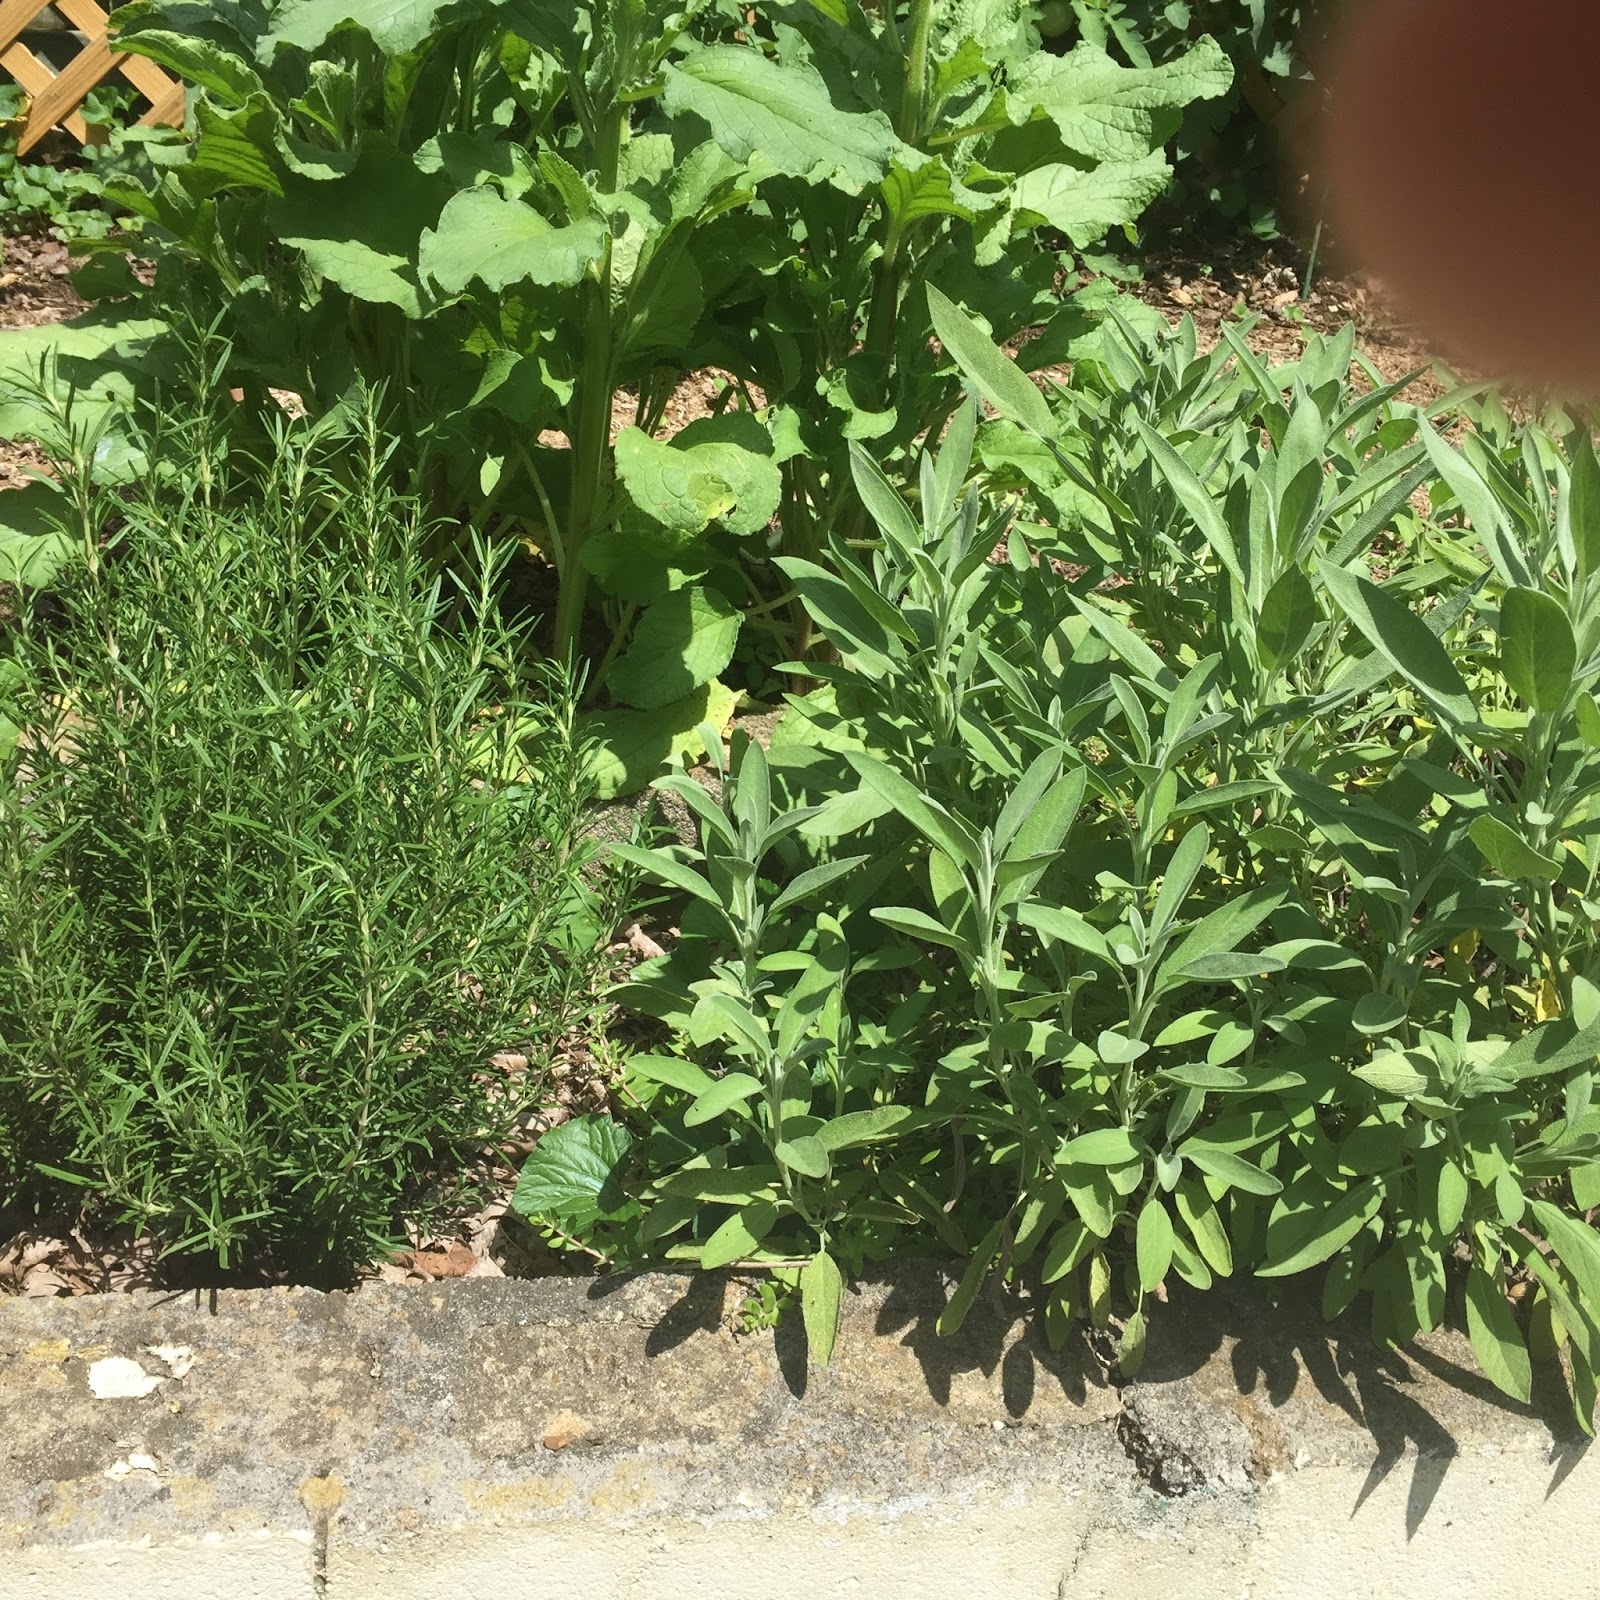
The rosemary and sage seem to like their spots. There are multiple plants of each of these, and I recently had to (viciously) cut back the sage as it was making a bid for world domination, but I waited for it to finish its show of purple flowers first!


The asiatic lilies were here when we moved in, but they are now tucked between the sage and lavender, which is also in bloom. You can also see the borage blooming behind it in the in-ground garden.


These tiny portacula (also known as moss roses) are on their third or fourth round of blooms. These are some of my favorites this year, but I kind of wish I had planted them closer together! Live and learn...


The dill I purposefully planted two years ago continues to re-seed itself. It smells heavenly!


Please excuse my finger that made its way into the following picture. Since so many of my seedlings got fried this year, the hubs and I bought several pepper plants from the farmers market. There are five varieties this year, so we should be set for peppers for quite a while! I planted most of them in pots to save room in the raised beds.


The in-ground garden is having a great first year! Maybe it's the virgin soil, or the compost nd organic fertilizer I dug in, but nearly everything I planted here is huge and growing fast! Case and point, I had intended the middle path to be easily walkable, but I definitely have to turn sideways to avoid breaking off errant tomato branches.


The swiss chard is looking lovely, and one of my projects for the day is to make chard chips from these lovelies!


A better picture of the borage. I have never planted this before, but bees love it, and the tiny flowers taste like cucumbers! I also hear that you can eat the leaves if you get them when they are small, but they get spiny and tough when they get large.


I have had to steak, tie, trellis, etc. all of the tomato plants. They are HUGE and have tons of green tomatoes on them right now. You can see them peeking through the leaves, and I've got one or two that are almost ripe!


Another experiment this year is pumpkins. I planted Jack-be-little pumpkins. They are small sugar pumpkins that are ideal for small-space gardening, and can even be grown in a large container and trellised! I planted one to grow on the ground like traditional pumpkins, and a few more to be trellised. I wanted to see if one way worked better than the other, so I'll keep you posted on what I find!


Moving on to the raised beds, the squash is blooming! I only planted two of these so we wouldn't get overwhelmed by squash as the summer goes along. As much as I love yellow squash, I don't need five tons of it!


I ran out of appropriately sized pots before I ran out of peppers, so some of them ended up in raised beds after I dug out the onions. Supposedly, this is a less than ideal rotation, but I had to have a place to put them, so hopefully they'll turn out okay. One of them is currently sporting a banana pepper, so I'll take that as a good sign!


The second bed is planted with nothing but beans. I plant bush habit green beans every year because they always give a good harvest, and freeze well, but I also planted some speckled lima beans my mom gave me seeds for. The seeds are gorgeous...red with black speckles. I can't wait to see what they taste like!


The third bed is planted with purple beans and another trial this year: okra. I love making vegetable gumbo (it was one of my grandmother's best loved recipes), so I'm hoping for a good crop to go with my tomatoes so I can make a big pot or two!


The last bed is planted with turnips, which you can see peeking up above the soil, more peppers, and what is looking to be failed malabar spinach. You can see in the close-up picture how tiny those seedlings are, and I planted them in March!! What a disappointment. I probably should cut my losses and find something else to plant there, but I kind of want to see what happens with them. Supposedly, this variety will grow through the summer, but I will need to give it some kind of trellis to grow on.


So there you have it. One very long post, but a good idea of what is going on in the veggie garden. I have a couple of to-do's which should get done in the next week or two, but other than pulling weeds and keeping things watered, the garden is mostly self-sufficient, which is great. How is your garden doing?

Monday, May 25, 2015

Gardening After Graduation

School is out (I officially graduated with my masters degree...woohoo!) and I've actually gotten to do a fair amount of work in the garden this past week or so. The well-meaning schedule from my last post did help some, but I had no idea just how crazy my last semester would be. With a graduate recital, a lead role in the opera, a recital with the piano trio ensemble, papers, and auditions, I didn't have much time for gardening, and many of the seeds that I did start died from neglect.

In spite of that, my garden is actually doing quite well. I ended up purchasing some tomato starts since every one of my tomato seedlings died, as well as a few basil and Rosemary plants. Some seeds I sowed directly, and those have mostly thrived...due to a rainy spring, not to any attention I from me!

I did manage to get the new in-ground garden tilled, and the soil amended with organic fertilizer and compost. Regardless of whether it's from my efforts or because of some native grow juice, the plants in the new garden are doing really well.

I'll try to post some pictures in the next couple of days (the current state of raininess doesn't lend itself to great pictures). I just got all of my beans and okra planted yesterday, so hopefully I'll be seeing some sprouts soon!

Thursday, January 1, 2015

Tentative Garden Schedule

Happy New Year! I mentioned a few days ago that I was working on a schedule of garden tasks so I will be more likely to achieve said goals. I am nothing if not goal and deadline oriented.

Anyway, what follows is a TENTATIVE schedule of garden to-do's. Many of these (particularly the ones that involve some kind of construction or soil work) are weather dependent, but this at least gives some sort of structure to what might otherwise seem like an overwhelming task of getting the garden started for the year.

December 30:
*Construction - attach lattice to fence for trellis

January 1:
Plan  garden layout
Cutoff top of one barrel. Drill holes in sides and bottom to use as compost bin

January 2:
*Seed starting - lettuce, basil, perilla
Wash pots with bleach and water first

January 4:
Cut top out of other barrel, install spigot and figure out how to attach screen or landscape fabric over top to keep out leaves and bugs. Store in shed till warmer weather.

January 17-18:
*Seed starting - verbena, celery

February 7-8:
*Seed starting - scarlet poppy, jalapeƱo, bell peppers

February 21-22:
*Seed starting - tomatoes, cauliflower, Iceland poppy

March 7-8:
Till in-ground garden. Make sure to add compost and organic fertilizer!

March 9:
Amend soil in raised beds with compost and organic fertilizer 

March 11:
Attach gutter to back of shed with a downspout that will pour into the rain barrel.
Level ground under downspout and set up rain barrel on concrete blocks.

March 14-15:
*Seed starting - squash, 
*Direct sow - peas, turnips, spinach, Cleome, zinnia, cosmos, portacula, hyssop

March 28-29:
*Direct sow - Swiss chard, mustard greens, carrots,

April 4-5:
*Seed starting - 
*Direct Sow - bachelor's button, borage, beets

April 18-19:
*Direct sow- sunflower, hollyhocks, marigolds

May 2-3:
*Direct sow - pumpkin, cucumber

May 16-17:
*Direct sow - beans

Tuesday, December 30, 2014

One goal down: building a trellis

Ok, one garden goal down! I jotted down my list of goals in my last post, and I'm happy to say that I have completed one of them. As I was sketching out a schedule (which is still on the way), I decided I would be more likely to achieve the larger construction goals if I completed at least a few of them while I am on break from school. Because when the spring semester starts, things are gonna get CRAZY.

Building a trellis on the fence where my in-ground garden is going to be seemed like a good and simple goal to start with. Here's a picture of the area. It's the spot between the retaining wall and the fence where the leaves are spread out to smother the grass and weeds.


 I've been thinking about doing this for a while (since last year, actually), so I've had time to debate what kind of materials I wanted to use. I was thinking of using wire fencing and stapling it to the fence posts, but the hubs objected saying that it would probably look "hideous" (his word), and he would rather I use sheets of trellis. The price worked out to be about the same between the two methods, so we came home from the hardware store with five sheets of lattice.

I had the forethought to actually measure before we went to the store, so I knew my fence posts are 8' apart, and about 6' tall. Sheets of trellis turned out to be 8' long and 4' wide. Thus, I got five sheets of lattice and had two of them cut in half lengthwise at the store.

I had a couple of false starts. I originally thought to use some scrap wood blocks to hold the lattice away from the fence. I got my blocks cut and screwed onto the fence like so...


But since the fence posts already stick out from the fence, it caused the lattice to really bow and seem unstable. It also made it a lot harder to actually screw the lattice down because the two didn't always match up if I had the lattice level. With that failed attempt, I removed the wood blocks and simply screwed the lattice directly to the fence posts.

I didn't get the cut in half pieces up. The hubs was out and it would have taken two people to get the pieces of lattice up and screwed on. Also, I'm not sure how it will look since my fence is on a slope. Additionally, see how the lattice sticks out from the actual garden spot? It doesn't line up with the fence post (sad face), so maybe I will put a large pot there and plant something in it that vines. We shall see. I'll have to do some experimenting!

I've seen some really creative trellis designs, some meant to be decorative, and some purely functional. How did you go about making your trellis?