Tuesday, July 31, 2012

Building New Raised Beds

I've been planning to put in some raised beds for flowers and vegetables since we moved in last month. I have to admit, I've been procrastinating, but finally, they are in and ready for planting!

There are a couple things that make putting in raised beds in this yard a little more complicated than at the old place. We discovered the soil in our yard is extremely rocky and hard to dig (we discovered this when we went to plant the hydrangea and had to invest in a pickaxe), plus our yard is sloped, so I either have to dig out a level spot (lots of work!), or build the bed in such a way as to accommodate the slope (which seems like it could get complicated).

After much deliberation, I decided that digging would be the way to go. I figured that I'd have to dig out the ground under the beds a little bit anyway, so I might as well create a level spot while I'm at it. Plus, after redoing our fire pit, I was pretty confident that I could do the whole leveling thing.

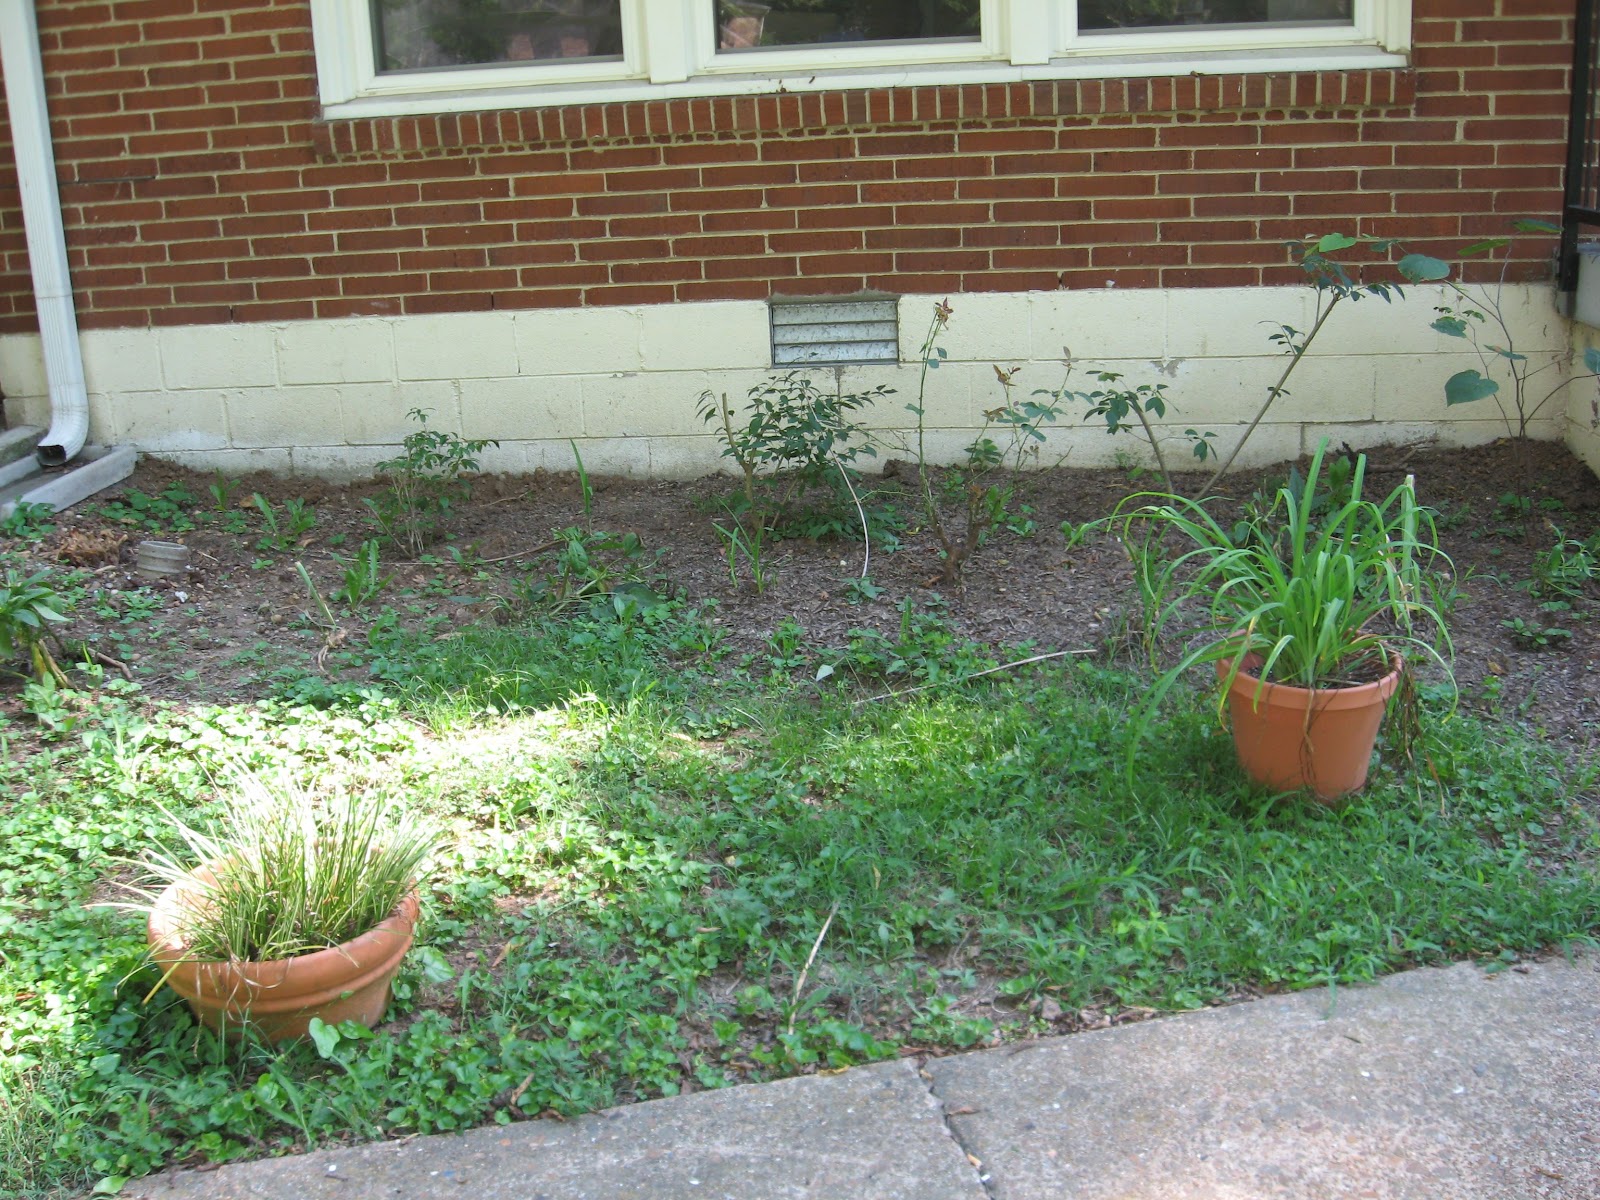
All the same, I wanted as level a spot as possible to begin with. Here's the spot I chose (before I started digging).


I decided to start with two 4'x4' boxes. I figure I can always add more later if I need the extra space. After conferring with the very helpful guy at Home Depot, I also decided to use pressure treated pine for the construction. I considered cedar boards, since they are rot resistant without all the chemicals of pressure treated wood, but they are significantly more expensive. Plus, I would have needed to stain/seal them, which puts back all the chemicals I was thinking to avoid by using cedar.

Four 2x10x8's (each cut in half to make 4' sections), a couple of galvanized corner brackets, and some decking screws later, I was home with my materials...which sat there for the better part of a week while I hemmed and hawed about all the digging I was going to have to do.

Saturday came, and I got up the nerve to start digging after I mowed the lawn (I was already sweaty and gross, might as well keep going, right?).


I got the first bed dug and quasi-level before realizing it was really going to take an extra set of hands to get the boxes built.

So I called in reinforcements (thanks Pat!) and Sunday morning, the boxes were built and put in the ground in no time! Here's the end result...


As you can probably see, I still need to add a little dirt to the one on the left. Here's a close up on that one...

You can see where I put the little bit of mushroom compost I had leftover from planting peppers in the retaining wall bed when I ran out of garden soil. I mixed the topsoil I had dug out with garden soil, but underestimated how much garden soil I was going to need. Oh well....good thing Home Depot is close by!

So what do you think? Just in time for some fall planting, right? Speaking of which, I picked up a few seeds that I'll be planting this week!

Monday, July 30, 2012

More Pass-Along Plants

I've mentioned before how much I love pass along plants not only as a way to get plants for your garden on the cheap, but as a way to keep your beds from getting over-crowded.

A few months ago, my voice teacher and his wife dug up about half the plants in their garden while they were clearing space for workers to build them a new retaining wall. They new we were in the process of buying a house, so they said they would keep the plants they weren't going to put back in pots for us until we had a place to put them. Very sweet of them!

So a couple of weeks ago, I went and picked up all the plants that were waiting for us. There were several forsythia bushes, a red bud, some shasta daisies, rudbeckia and flox and some ornamental grass (meant for borders). I spent a couple hours the next day placing, planting and watering all those plants. Fortunately, the soil was easy to dig (unlike in the back yard), so getting everything in the ground wasn't too hard. Here's what it looks like now:
Left Bed

Right Bed
I still have some filling in to do. These beds are quite large. I also need to put some newspaper down to kill the weeds and grass, and then mulch on top of it to give the beds some definition.

I noticed today my rudbeckia is starting to bloom!

And my flox! Huzzah!


Saturday, July 28, 2012

I'm Feeling Rosy

Remember those scraggly rose bushes in the back yard retaining wall bed? They looked like this when we moved in...


Pretty pathetic, right?

Well, I trimmed them back a couple weeks ago, just to see what happened. I figured if I killed them, oh well...I can always put something else there in its place. So I got out my pruning shears and started cutting...just removing the brown, dead stuff and stems that seemed strangely out of place. I also mulched with a little mushroom compost.

It seems my efforts have paid off! I started noticing new growth almost right away. Here's what they look like today...


There's definitely still room for improvement, but baby steps, right? I think I'm actually going to have to figure out something to do with the larger one (maybe a trellis?). It's starting to arch overhead rather precariously. I have no idea what kind of roses these are. If anyone happens to know, an ID would be very much appreciated!

Do you grow roses in your garden? What do you do to care for them?

Oh! and in other news (though still on the rose theme), one of my students gave us a  lovely housewarming gift. And how appropriate is it that her name is Rosie?


Thursday, July 19, 2012

A Comedy of Errors

No, I didn't do a Shakespeare play in the backyard, but I did cut my yard for the first time this past week.

While this really shouldn't be a big deal, you have to understand that I've never so much as started a lawnmower (Dad always cut the grass growing up), so while I had a general idea of how it's done, I'd never actually cut a lawn before.

So let's get the shameful head hanging out of the way....my lawnmower totally kicked my butt. I'm so sore today I can barely move.

Basically, the way this went, was I pushed the lawnmower outside, started it up, started pushing it across the yard......and got stuck. Picture my throwing all of my body weight against this thing trying to push it, all the while the lawnmower not budging. I'm sure the neighbors were on the floor laughing at me.

I soon remembered that when my husband had put the lawnmower together, he put the blade on the lowest setting. No wonder. My yard is pretty bumpy....I was just scraping dirt. Ok, so I'll change the blade setting. Except that involves taking the wheels off, lifting the entire lawnmower, and putting the wheels back on in the setting you want. Good thing my lawnmower isn't very heavy.

Now here's where it got really funny. My husband is REALLY strong....like can pick couches up and walk around with them strong. He had the bolts on the wheels so tight I had my entire body weight on the wrench and it wasn't moving!

Well I finally got the wheels off, back on and started mowing again....only to have one of the wheels fall off. Guess I didn't get the bolt tight enough.

FINALLY got myself together. I have to admit, I only got the front yard cut because after dealing with the whole wheels thing, I was pretty exhausted. But I know next time it will be easier!

Anyone else have some hilarious yard/garden stories? Come one....you know you want to share!

Monday, July 16, 2012

Remaking Our Firepit

I mentioned before that our firepit was a bit of a safety hazard when we moved in. The previous owner had basically piled random rocks and brick pieces in a (very large) circle and called it good. If you so much as bumped the rock border, said border went rolling away....not so great when they are heated from a fire. Here is a refresher on what it looked like.

Looks a little precarious right? Well, the hubs and I decided to fix that. Using a wheelbarrow we borrowed from some friends (thanks Pat and Jessica!), Jacob hauled off all those rocks and pieces of brick.

After that was done, off we went to Home Depot to find circular pavers. What we came up with was the pavers that are used to build retaining walls. At just under $2 per paver, we needed 16 pavers, so the total cost of this was about $30 (a small price to pay for the added safety and aesthetic appeal!). The really awesome thing: some of our wonderful friends gave us Home Depot gift cards as housewarming gifts...hooray! and thanks!!!)

After our little foray to Home Depot, my lovely (and studly) husband carted all the pavers to the firepit area while I started digging into the ash and sand that was already there to make a level and correctly sized ring for us to place the pavers. Turned out it works better to level enough space for one paver, place the paver and repeat until you have a full circle. Fortunately, it didn't take me long to figure this out.

Once we had a full ring of pavers, we created a second layer, just placing another ring of them on top of the ones that were already there...and without further ado, here is our new firepit!
Definitely need to do something with that dirt patch to make it look at little neater. I suspect the bermuda grass will take care of it for me though! 

I should mention that we have not gotten to use this puppy yet. The weekend we made it, it was 109, 105 and then 106 degrees, and Nashville was under a burn ban. That burn ban lasted for another week and it's been raining ever since (and good thing too, since it didn't rain for over a month here!). *sigh* Hopefully we'll get to use it soon!

Sunday, July 8, 2012

Introducing....A Blank Slate (Part II)

Man is it hot here! I don't know what the weather is like where you are, but we've been breaking records left and right here in Nashville - and since we haven't had rain in over a month now, things are looking pretty brown and crunchy outside. I've been out early in the mornings watering before it gets so hot that any water will evaporate before it can do any good.

But enough about the weather. Here is my new back yard!

The previous owner graded the lawn to run into the creek on the other side of the fence so the house, and in doing so, created this retaining wall that makes a nice patio space. We're planning to use something like cobblestones to eventually pave in this space. You can see (kind of) where someone had dumped a bunch of gravel to try to create a patio space, but the weeds have taken over since it was last taken care of.

You can see where all my plants were pretty unceremoniously dumped when we were hurriedly moving everything in. I've spread them out a little since then.

Here, you can see I was in a hurry to get at least some of my vegetables in the ground. The retaining wall has a pretty handy built in bed, so I've been gradually planting the veggies I started back in February, adding mushroom compost to the soil as I go to give things a little boost.

I do have to figure out what to do with the two scraggly rose bushes in the retaining wall. Any suggestions??

We do have a pretty awesome deck....

...That's built right up to this gigantic hackberry tree. It will probably eventually come down. You can't tell from the picture, but it (and one other tree back here) hangs over the house, and the other tree is even closer to the house than this one!

We also have (actually, that's a had now...I'll do a post on it soon) a gigormous fire pit. Seriously, this thing is like 7 feet in diameter. The previous owners could have roasted pigs in this baby.

The only problem is that the border is just random rocks piled up in a circle, and if you so much as tap them, the go rolling away (maybe a bit of a safety hazard if there's actually a fire going).

Just beyond the firepit, we'll put a toolshed and a compost bin.

And here is where (I think) I'm going to put some raised beds.

So there you have it....my new backyard!

Friday, July 6, 2012

Introducing.....a Blank Slate (Part I)

Whew! We are all moved in, and though we are still unpacking, I thought I'd share my blank slate of a yard with you all. I'm going to split this post into two in the interest of not writing the longest blog post EVER, so without further ado, I present to you my front yard.

First (and yes, I know this isn't technically the front yard), here's what our garage looks like....well....kind of. Right now, we'll call it Mt. Box ok?

Before you get too scared, here is a wider shot....no....we did not have boxes piled five feet high through our entire garage (just part of it).

Actually, at the bottom of that picture, you can see my first little indoor project happening (shelf painting!), but we'll talk more about that later.

Here's the front of the house from the end of the driveway. Not terribly exciting (yet), but we're getting there. The gigantic hackberry tree next to the driveway is going to come down probably this winter. Hackberries spit a sap that ruins the paint on cars, so one hanging over the driveway is really not ideal, especially since the garage is not going to stay a garage.

Not really sure what these little trees/bushes are off to the left of the driveway, but I am going to have to trim them back so they don't invade the driveway as well as getting the vines off of them.

Now this, I am pretty excited about. We have a lovely hibiscus bush in the front yard. You can see the end of the pretty purple blooms (it was covered in them a few weeks earlier).

There is all kinds of ivy growing up the trees in the front and back yards. We actually tackled getting it all off of the trees last weekend. The vines look great, but they bore into the trees and can kill them.


You can actually see the little tendrils the vines send out to attach themselves to the tree. No good!!

Moving on....I now present you with the ugliest lollipop ever.....
This guy has already been removed as well (I'll get some after pictures soon!). There are/were a couple problems with this: it blocks one entire window in the living room (not cool), it was growing up into the power line to the house (really not cool), and since it is so big and rotund, it also blocks the view of the path to the front door from the driveway (REALLY not cool, and a safety hazard, especially for when the hubs deploys again).

To the side of the front door, there is this wonderfully fragrant gardenia....


....and a not-so-wonderfully scraggly rose bush.....
....and that's it for what's in front of the house. Fortunately, my wonderful voice teacher and his wife have been saving some bushes they dug out of their front yard for us, so we will hopefully have something to put here soon!

Lastly, here is my awesome red front door! The porch needs to be power washed and repainted, but we've all got to start somewhere, right?


Whew! Hopefully I didn't totally bore you with all that. I am making my to-do list as I go along. What have you guys been up to? Did everyone have a great 4th?