Tuesday, December 30, 2014

One goal down: building a trellis

Ok, one garden goal down! I jotted down my list of goals in my last post, and I'm happy to say that I have completed one of them. As I was sketching out a schedule (which is still on the way), I decided I would be more likely to achieve the larger construction goals if I completed at least a few of them while I am on break from school. Because when the spring semester starts, things are gonna get CRAZY.

Building a trellis on the fence where my in-ground garden is going to be seemed like a good and simple goal to start with. Here's a picture of the area. It's the spot between the retaining wall and the fence where the leaves are spread out to smother the grass and weeds.


 I've been thinking about doing this for a while (since last year, actually), so I've had time to debate what kind of materials I wanted to use. I was thinking of using wire fencing and stapling it to the fence posts, but the hubs objected saying that it would probably look "hideous" (his word), and he would rather I use sheets of trellis. The price worked out to be about the same between the two methods, so we came home from the hardware store with five sheets of lattice.

I had the forethought to actually measure before we went to the store, so I knew my fence posts are 8' apart, and about 6' tall. Sheets of trellis turned out to be 8' long and 4' wide. Thus, I got five sheets of lattice and had two of them cut in half lengthwise at the store.

I had a couple of false starts. I originally thought to use some scrap wood blocks to hold the lattice away from the fence. I got my blocks cut and screwed onto the fence like so...


But since the fence posts already stick out from the fence, it caused the lattice to really bow and seem unstable. It also made it a lot harder to actually screw the lattice down because the two didn't always match up if I had the lattice level. With that failed attempt, I removed the wood blocks and simply screwed the lattice directly to the fence posts.

I didn't get the cut in half pieces up. The hubs was out and it would have taken two people to get the pieces of lattice up and screwed on. Also, I'm not sure how it will look since my fence is on a slope. Additionally, see how the lattice sticks out from the actual garden spot? It doesn't line up with the fence post (sad face), so maybe I will put a large pot there and plant something in it that vines. We shall see. I'll have to do some experimenting!

I've seen some really creative trellis designs, some meant to be decorative, and some purely functional. How did you go about making your trellis?

Sunday, December 28, 2014

Garden notes and plans for this year

Hi everyone! I've been pretty quiet the past year or so (graduate school is a jealous mistress), but I thought I would share a few thoughts I had from last year's garden as well as some plans/goals I have for this year.

I have to say that last year's garden was pretty disappointing, and it was my own fault. I failed to amend my soil in my raised beds from the year before, and realized too late that there were not enough nutrients in the soil to support healthy plant growth. Also, most of my seed starts failed because I did not water them consistently. I blame this partially on my school schedule (leave about 7am, return after dark), but really, I could have watered the seedlings in the dark when I got home each night. Also, once I did get plants in the ground, I was gone for two weeks mid-July (for a good reason! I was singing opera!) and my non-gardening husband didn't really keep track of watering. The whole fiasco made me wonder...does anyone else have years where their schedule blows up in their faces and their gardens suffer for it, or am I the only one?

I got a few green beans, a few carrots, no tomatoes, no squashes. I did get plenty of jalapenos and LOTS of onions. Go figure.

This year, I am determined, will be different.

I have been reading some interesting books on gardening and composting and am starting my plan early. I'm also making the beginnings of a task schedule to keep myself motivated, and to have the tasks of planting, building, etc. divided into what I hope will be small enough bits to tackle between my school work. That said, the following is a list of plans/goals for my garden this year, in no particular order:
  • Amend the soil in the raised beds with good compost (from my compost pile, and additional purchased compost as needed) and a good organic fertilizer. Whether I purchase this fertilizer in a ready-to-use form, or mix it myself is yet to be determined.
  • Till and amend the soil between the retaining wall and the fence for an in-ground garden.
  • Attach some sort of trellis to the fence for taller plants in the in-ground garden.
  • Add an additional compost bin. I've only got one right now, and I would like to let the materials that are in there break down without adding more for a while. Ideally, I'd add two more, but I'm not sure the hubby will let me get away with that!
  • Attach a gutter to the back of the shed and set up my rain barrels.
  • Start seedlings on time and water them regularly!
There are some big goals on this list, but I think that if I make a schedule and start early (particularly with building the structures, which don't require that it be warm outside), I can accomplish all of these things. I'll be back in a few days with a schedule once I get it worked out!

Tuesday, December 31, 2013

Garden planning 2014

This is the time of year when I start to get antsy for spring. Now that Christmas is over and the new year is rolling around, I'm ready to start sowing seeds and watch new growth.

I have a couple of goals for the garden this year, and while I'll be plenty busy with school in the spring months, I'm confident that I can make these happen. Here are some of my garden goals for the new year:

  • Use more heirloom and open-pollinated seeds
  • At the end of the season, save those heirloom seeds for next year!
  • Use up old seeds from years past 
  • More freezing and canning. I froze a lot of green beans, and a few tomatoes after stewing them, but that was as far as it went.
  • Plant more mosquito-repelling herbs and flowers
  • Plant more bee and butterfly-attracting herbs and flowers
  • Find some new recipes to use more of the harvest
  • Get some more grass growing in the backyard
Those are some hefty goals, but I think they will make a big difference in my family's lifestyle and budget. Do you set goals for your garden regarding output, use, or environmental impact? I'd love to hear about them!

Sunday, December 29, 2013

Newest addition: a dishwasher!

Merry belated Christmas! I hope you all have been doing well the last couple months. Things have been INSANELY busy here between school and work, so I made the executive decision to put home improvement projects and the blog on hold until I got to Christmas break. Anywho, to the topic at hand...

We knew when we bought our house that we would be washing dishes by hand for a while. Not only was there no dishwasher, there wasn't even a place to install one! This is our kitchen when we moved in.


No dishwasher...that blank space to the left of the sink is where a refrigerator originally resided.

This routine of washing dishes by hand was fine for a while. I never had a dishwasher in my college days in Boston, but as often as we cook and entertain, handwashing every dish has been pretty cumbersome. It is by far the chore that we spend the most time on. My poor, wonderful mother-in-law washed every dish from Thanksgiving dinner for five people and it took forever, even with another person drying and putting away as we went.

Since I've gone back to school, my husband (who is also wonderful) has been doing most of the dishes because he has been home so much more than me, but he is starting school in January as well! So with BOTH of us in school and working, we decided what we really wanted for Christmas was a dishwasher. The consensus was that it would make our lives WAY easier, and would free up a lot of study (and fun) time for both of us. Well, thanks to a very generous gift from my parents, we finally have a dishwasher!

We decided to go with a Bosch for its low volume and efficiency. However, before it could be installed, I had to build a place to install it!

Since we aren't ready to tackle a remodel yet, we decided that a temporary box made of plywood would be fine. Just something to keep the dishwasher from walking across the room. Since the sales guy from the appliance store gave me a diagram with the dimensions of the dishwasher and surrounding box, This was pretty easy. I picked up a couple pieces of plywood and a 1x2 from Home Depot, and had the nice man in the lumber department cut the plywood to size. I think everything cost about $40. I painted the plywood so that it was waterproof. Next, I cut the 1x2's into the correct lengths to be used for supports. Lastly, I installed the plywood by screwing it into the 1x2's, using a level to make sure nothing turned out crooked. This is what I ended up with.


Oh, and I also later added a shim under the front of the vertical piece to hold it steady, since there wasn't a good way to attach it to the tile. I did try drilling through the tile to add a bracket to the floor, but the tile bits kept losing their pointed heads. Has anyone else had that happen?

Anyway, when the guys came to deliver and install the dishwasher, they had to drill a hole at the back corner of the cabinet to run a water line. They also had to work some plumbing magic and install a split valve under the sink and drill a hole through the horizontal plywood to run the electrical cord (I discovered too late that there is no electrical box under the sink). Here is the final result...


We are eventually planning to rip out (at least) everything from the countertops down and start over, so this is definitely a cheap temporary solution, but we have a dishwasher! Life is better already.

Tuesday, July 23, 2013

Remembering that it Never Hurts to Ask

My dad always told me that the worst thing people can tell you is "no" when you ask for things (this applies to jobs, prices, auditions....really anything). I was reminded today.

I set up an appointment for an exterminator to come out and do a yearly spray for bugs some time ago. They are the same people we used last year, and we found them through a deal on LivingSocial. I was hoping to see another deal from them this year, but so far, no dice. However, after I set up the appointment, a deal came up for another extermination company (for about $20 cheaper than our exterminator's normal price).

I hemmed and hawed about calling up the exterminator we were already using to ask them to match the price. I shouldn't have worried. They called me up just this morning to ask if they could come at a different time. I used that phone call (and my willingness to be flexible) to ask them (very politely) about matching the deal. The answer? "Sure! Why not?"

And that, friends, is why it never hurts to ask.

Saturday, July 6, 2013

Music Room: still plugging away...kind of

So I posted these pictures of the music room as it stands today in my post about what we've accomplished this year.


And then I realized I hadn't given any sort of update after painting the floors! *face palm*

If you look at that post, you'll notice I had already painted the walls and ceiling....well, mostly anyway. Can I just go ahead and admit that I'm STILL not done painting in here? *another face palm*

It seems like I got the bulk of the painting done (the walls and ceilings) and lost steam. I've caulked painted about half of the trim. I still have some touch ups to do around the tops of the walls. I got one coat of paint up in the closet....and it's just sat like that...for a couple months now! Obviously, I've done other things in that time, but this painting project is still staring me in the face.

Does this happen to anyone else? It's not like I don't want to finish in here....believe me....I would love to wash my hands and call this room officially D.O.N.E., but I think I'm suffering from remodel fatigue. I've spent the past nine months doing this by myself (hubs has been deployed)....and even though it makes me really proud when I go back and think about all the work I've done this past year with my own hands, I think about everything that's still left to be done and it just stresses my out sometimes.

Whine....snivel.....ok I'm done. Yoga breathing....one foot in front of the other is how things get done.

Anyone else lose steam in the middle of a project and leave it sitting for months? What do you do to get over the hump?

Sunday, June 23, 2013

The First Year

It's been a year (as of this past week) since we moved into this house, and man, have things come a long way! I thought I'd use this week's post to take a look at all the changes that we've made. Obviously, we're not done (is anyone ever "done" with their house?), but I have to say, we've accomplished quite a lot! Warning....this is kinda long.

This is the front of the house when we moved in...obviously taken by the realtor during the winter...


And here it is as it looks today.


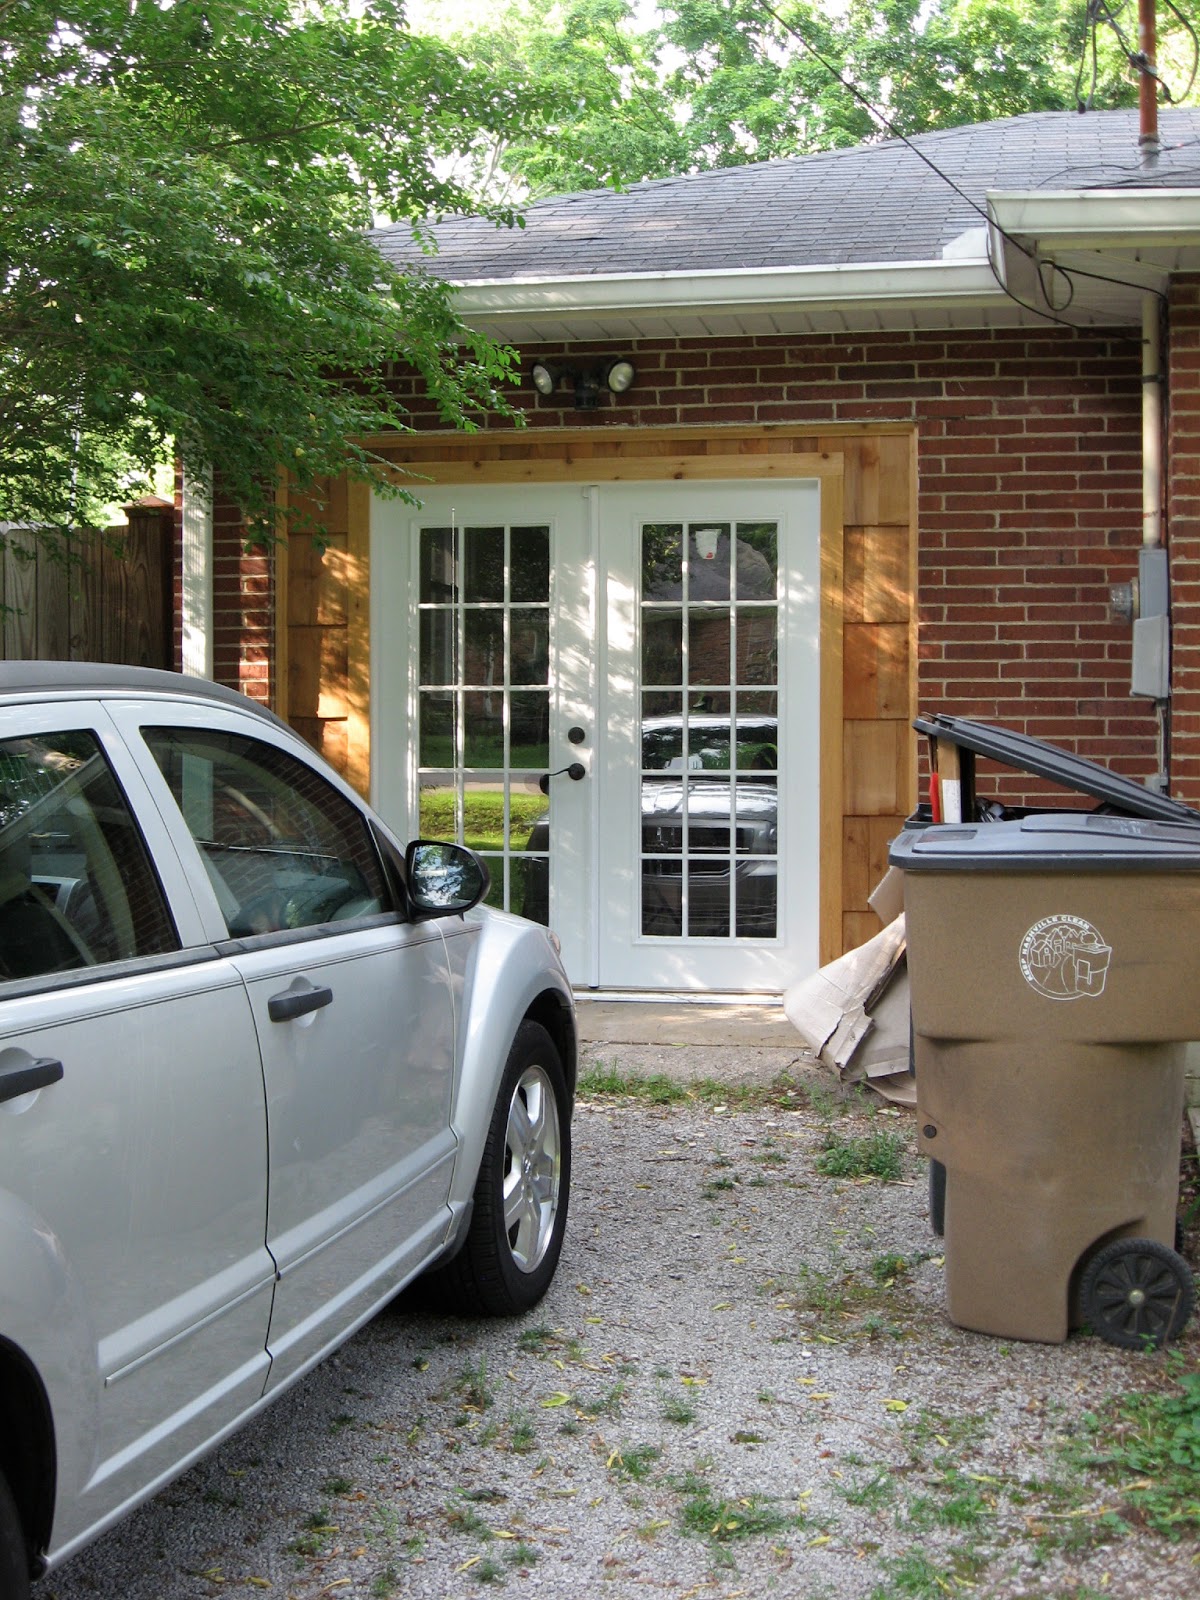
You can see we chopped down that odd looking lollipop tree (to let more light into the living room) and added more in the way of landscaping. Oh, and here is what replaced the garage door, since it is no longer a garage.


I love the cedar shake framing the door. Still trying to figure out a good place for the trash cans...hmmmm....moving on to the back of the house!

Here's the before...


And the now (I wouldn't really call it an after).


You can't see in the picture above that I've painted the back doors. Better pictures are coming!


You can see in the one above the new shed and garden boxes.
 

If you stepped inside the front door the day we moved in, this is what the living room looked like.


And as it looks today


Huge improvement, no? Those built-ins make a HUGE difference in the functionality of this room. I still have some playing around to do with the furniture arrangement on this side of the couch, but this room has come a long way!

Here's the kitchen before...

and now.


Obviously we haven't done much in here besides changing the appliances and painting the walls.

Here's the dining room. Lots of knotty pine....oh my, that was a lot of knotty pine...


And here's now it looks now.


I'm still in love with the Ikea light fixture in here. And I love the way this paint looks in the natural light coming in from the sliding doors.

This might be the biggest change so far....the garage....or what used to be the garage...


...and is now my music room. What a difference! It's easy to forget this room was ever a garage.


The master bedroom also looks pretty different. Here it is before...


And now. Glad that it's bright and airy...and not dead body beige anymore. Still need to add a closet though.


This is the guest bedroom as it looked when we moved in. Almost exactly the same as the master. Boring.


And now. Could be a whole different room and is so cozy!


Our crazy fiesta bathroom is still crazy and fiesta-like (yes...there are still sunflowers in the sink)...


But it looks a little more cohesive now with it's dramatic green walls, white curtain, and new light fixture. It's liveable now until we save our pennies to redo this room. In the meantime, it can induce all the giggles it likes.


Lastly, the basement. Aka...the man cave. Here it is when we moved in.


Still very cave-like (which, I suppose, is the point of a "man cave" haha), but much more comfortable.


Anyone else celebrating their "house-iversary"? Any cool before and current pictures? It amazes me what we've been able to accomplish in just a year to make this house our home!